Create an Inquiry
-
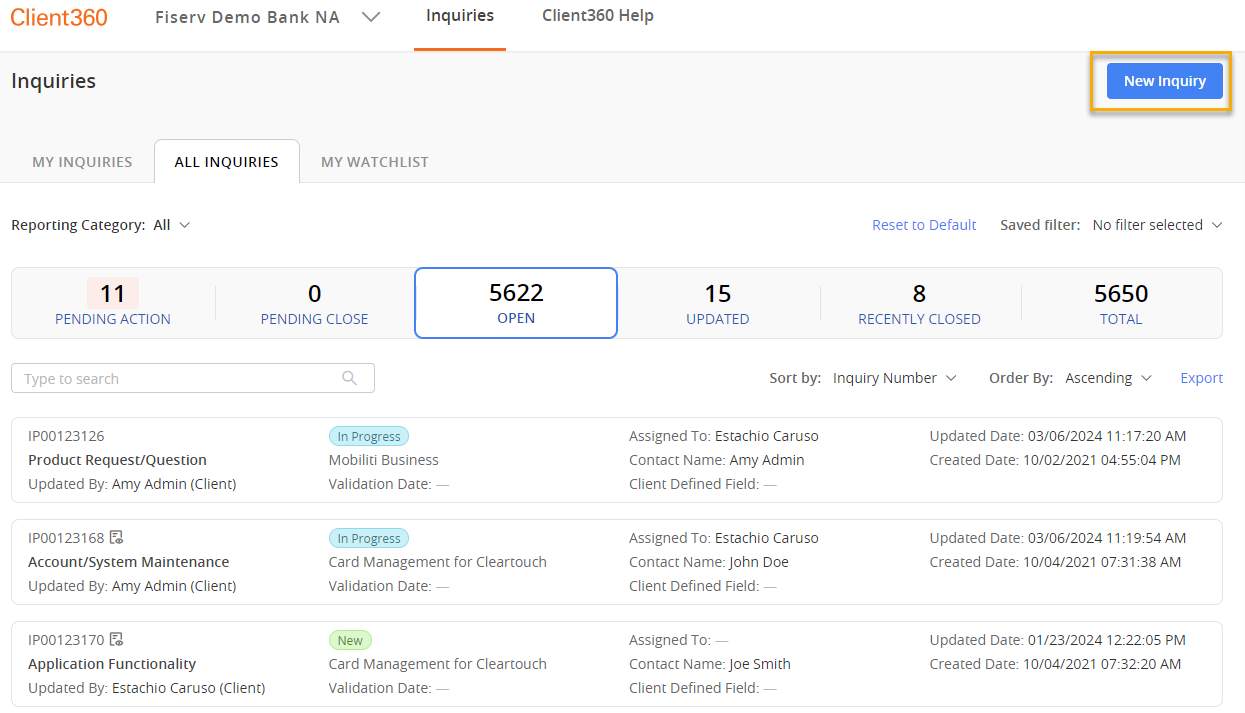
Select New Inquiry in the Inquiry Dashboard. You can also select this option directly from the home page.
-
Select the Client Name, Product, and Inquiry Type.
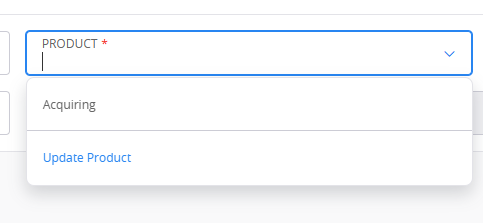
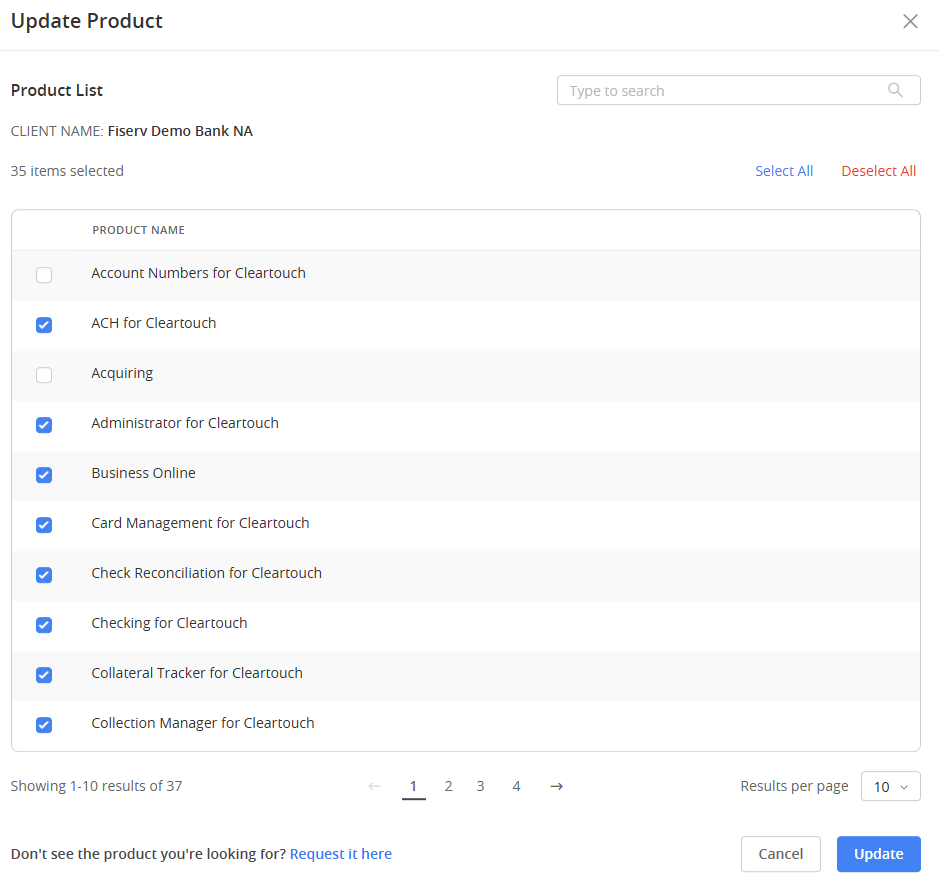
If you do not see the product for which you are opening the inquiry in the drop-down menu, select Update Product. A window opens with a list of products to which you have access. Check the boxes next to the product for which you are opening the inquiry, and then select Update. This gives you permission to create inquiries for that product in the future and automatically updates permissions for that product in your Product Preferences.
If you do not see the product you need, select Request it here and enter a detailed message explaining your request. Then select Submit.
-
Select the Inquiry Urgency and enter a Short Description. Format the short description as "Product - Issue". For example, "ACH for Cleartouch - Reset Password".
-
Select Next.
-
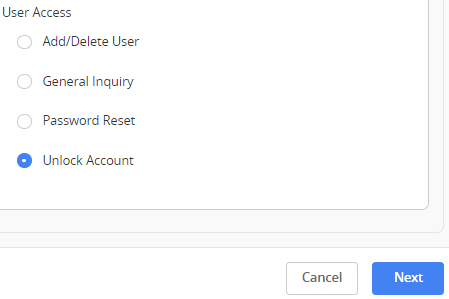
Select the category related to your new inquiry.
-
If you are creating a managed services inquiry, you might locate the User Access category and select Unlock Account.
Additional fields appear based on the selections you make. Enter as much information as you can. This will help us resolve your inquiry quickly and efficiently.
If you choose the Inquiry Type Implementations, you might see the Suffix field. This field refers to version identifiers during the implementation process. For example, you might be experiencing an issue in your UAT environment. If that were the case, you would enter UAT in the Suffix field.
-
Select Next.
-
Complete the remaining fields.
Enter detailed information. Adding context also helps provide a quicker and more accurate resolution.
Select the Back button in the lower-left corner at any time to go back to a previous step in the inquiry creation.
You can expand the text box for the Inquiry Details and Sensitive Comments fields at any time by placing your cursor in the lower-right corner and dragging the text box until it is your desired size.
-
Select Create Inquiry.


- Client Name
- The name of the client for which you are submitting an inquiry. Required.
- Product
- The product for which you are submitting an inquiry. Required.
- Inquiry Type
- The type of inquiry you are submitting. The most common option for this selection is Service. Required
- Category 1
- Client360 populates this field automatically with the name of the product. In some cases (such as Card Management inquiries), Category 1 helps to further group inquiries. Required.
- Category 2
- A way of classifying an inquiry. The Category 2 choice determines which group receives the inquiry. Required.
- Category 3
- A way of classifying an inquiry. Required.
- Inquiry Urgency
- This indicates how quickly the inquiry should be dealt with in relation to other inquiries. Fiserv associates have the option to update this field later. Required.
- Short Description
- This becomes the title of the inquiry. There is a 160 character limit. Required.
- Account Number
- The number of the account affected by the issue.
- Are You Receiving an Error Message?
- This is a Yes/No field where you can indicate whether you are receiving an error message.
- Error message and number
- Enter the content of the message and its number if you answered Yes to the previous field.
- Users Impacted
- The names of any users impacted by the issue.
- Browser
- The browser affected by the issue.
- Can This Issue Be Recreated?
- A Yes/No field that indicates whether Fiserv can recreate the issue to help solve it.
- Provide Steps to recreate
- If you answered Yes to the previous field, enter any steps to recreate the issue.
- Inquiry Details
- A detailed description of the issue you are experiencing. The description has an 8,000-character limit. Required.
- Sensitive Comment
- Any information that you do not want to include in the Inquiry Details due to privacy. Any sensitive comments appear in the Comments tab of the inquiry.
- Attachment
- Any supporting documentation for the inquiry.
- Watch List
- The people at your institution watching the inquiry. You can add both yourself and others to this list.

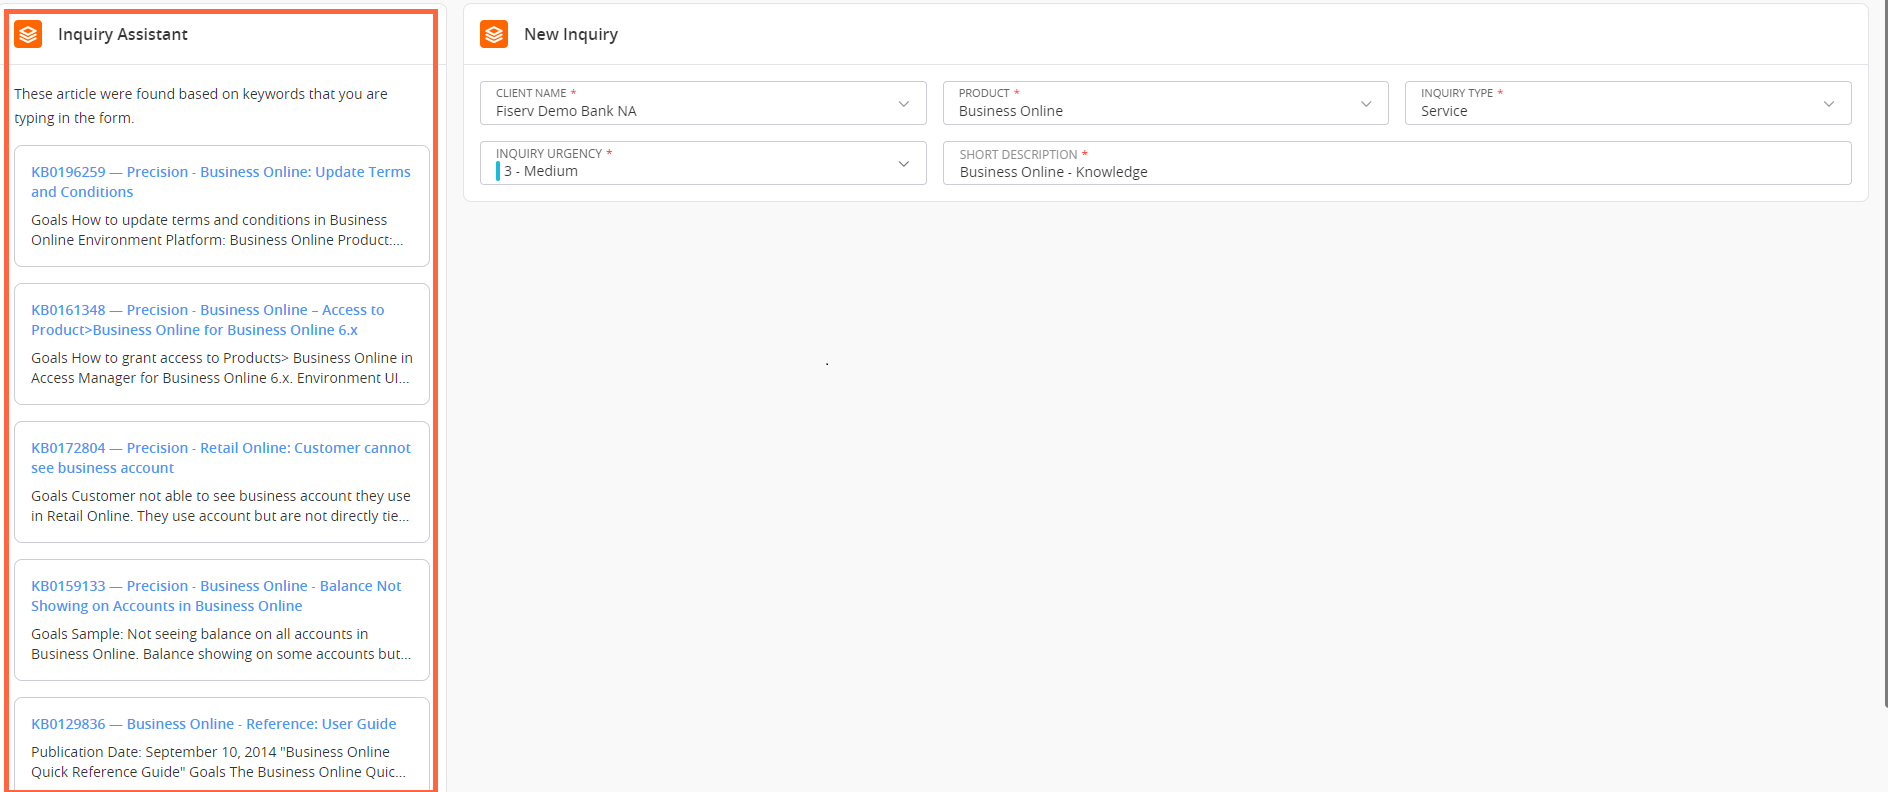
Use Inquiry Assistant to View Potential Resolutions
As you create your inquiry, Inquiry Assistant automatically displays Knowledge Articles that are a potential match to the inquiry. As you enter your inquiry's Short Description, Inquiry Assistant searches Client360 based on keywords contained within the description. If the tool finds any Knowledge Articles that relate to your inquiry's Short Description, it generates a list of those articles to the left of your inquiry. You can select any of the content cards to view the full Knowledge Article, or you can select See more articles to open the Knowledge Base and browse through more potential results.