Assign an inquiry
Assign an inquiry to yourself
To assign an inquiry to yourself, perform one of the following procedures.
-
At the top of the Inquiry Details, select Quick Actions.

-
Select Assign To Me.
If this process does not assign the inquiry to you, it is because you are not part of the assignment group assigned to the inquiry. First assign the inquiry to your team, and then assign the inquiry to yourself.
-
On the Inquiry Information tab, select
 (Edit).
 -
Scroll down to the Classification section.
-
Select Assign To Me.
InquiryPoint may remove the assignment group after you assign the inquiry to yourself. If this happens, add the correct assignment group using the following steps.
- Select Add in the Assignment Group field.
- Select the correct assignment group.
- Select Add.
-
Select Submit.
Assign an inquiry to an associate or client contact
- Select (edit) from the Inquiry Information tab.
- Scroll down to the Classification section.
-
Select Add in the Assigned To field.
InquiryPoint may remove the assignment group after you assign the inquiry. If this happens, add the correct assignment group using the following steps.
- Select Add in the Assignment Group field.
- Select the correct assignment group.
- Select Add.
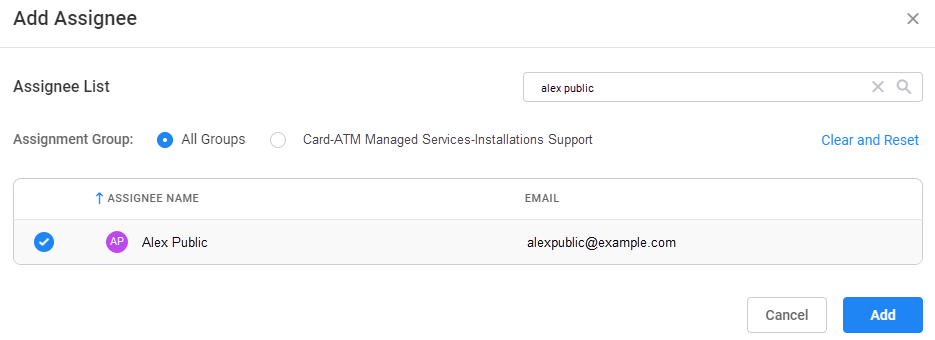
- Search for the associate or client contact in the Add Assignee window.
- Select the correct assignee.
- Select Add.
- Select Submit.
When you assign an inquiry to someone else, they will receive a notification from InquiryPoint.
Assign an inquiry to another team
-
Select
(edit) from the Inquiry Details. -
Scroll down to Deployment.
-
In the Client Deployment list, select the appropriate product.
-
Make the appropriate selections for Category1, Category2, and Category3.
These options correspond to the inquiry type menus for each product.
-
Scroll down to the bottom of the Inquiry Details and select Submit.
-
InquiryPoint automatically detects the appropriate team to handle the inquiry based on the information you entered. Select Yes to approve the new team assignment.
If the suggested team is incorrect, report it to the Client360 business unit's point of contact